Driveshaft Clutch Replacement Procedure
It is important before starting this or any other procedure, that you or anyone who operates, works with, maintains, services or repairs the Butler System and/or vehicle, be familiar with its operation and thoroughly read, understand and follow, in their entirety, all of the Warnings, Cautions, and Notices described in your Butler System and vehicle Owners’ Manuals. Some procedures will require the assistance of a second person.
Tools Required
- pry bar (or suitable tool)
- 3⁄8” drive ratchet
- 13mm 3⁄8” drive socket
- 10” adjustable wrench
- 3⁄8” drive torque wrench capable of 30lb-ft
Carefully read and understand the complete list of instructions before proceeding.
Clutch Removal Procedure
1. Inside the vehicle remove the Butler Equipment Shroud (black box).
2. Remove from the Driveshaft; the single High-Pressure Pump V belt and the two (2) V belts that drive the Vacuum/Blower.
3. In the vehicle's engine compartment, disconnect the negative battery cable.
4. Remove the two (2) front Driveshaft V belts. NOTE: in order to remove the two (2) V belts, some vehicles will require the removal of the air cleaner, the fan shroud and other components to gain access.
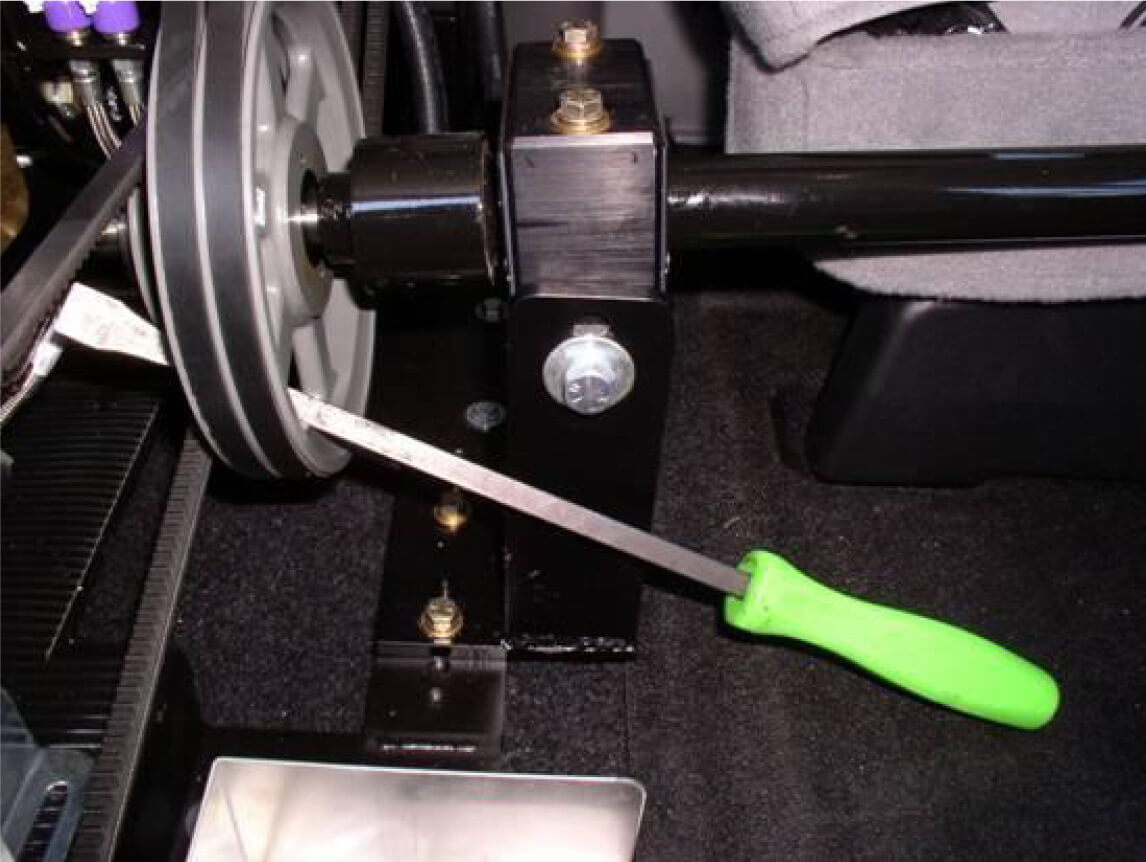
5. Have an assistant insert a pry bar (or suitable tool) through one of the slots in the double V groove pulley on the end of the Driveshaft inside the vehicle (see right). Position the pry bar to prevent the Driveshaft from turning.
6. Remove the front clutch plate center bolt (1 1/4 x 5/16 - 24nf) that attaches the front portion of the two (2) piece clutch (see right).
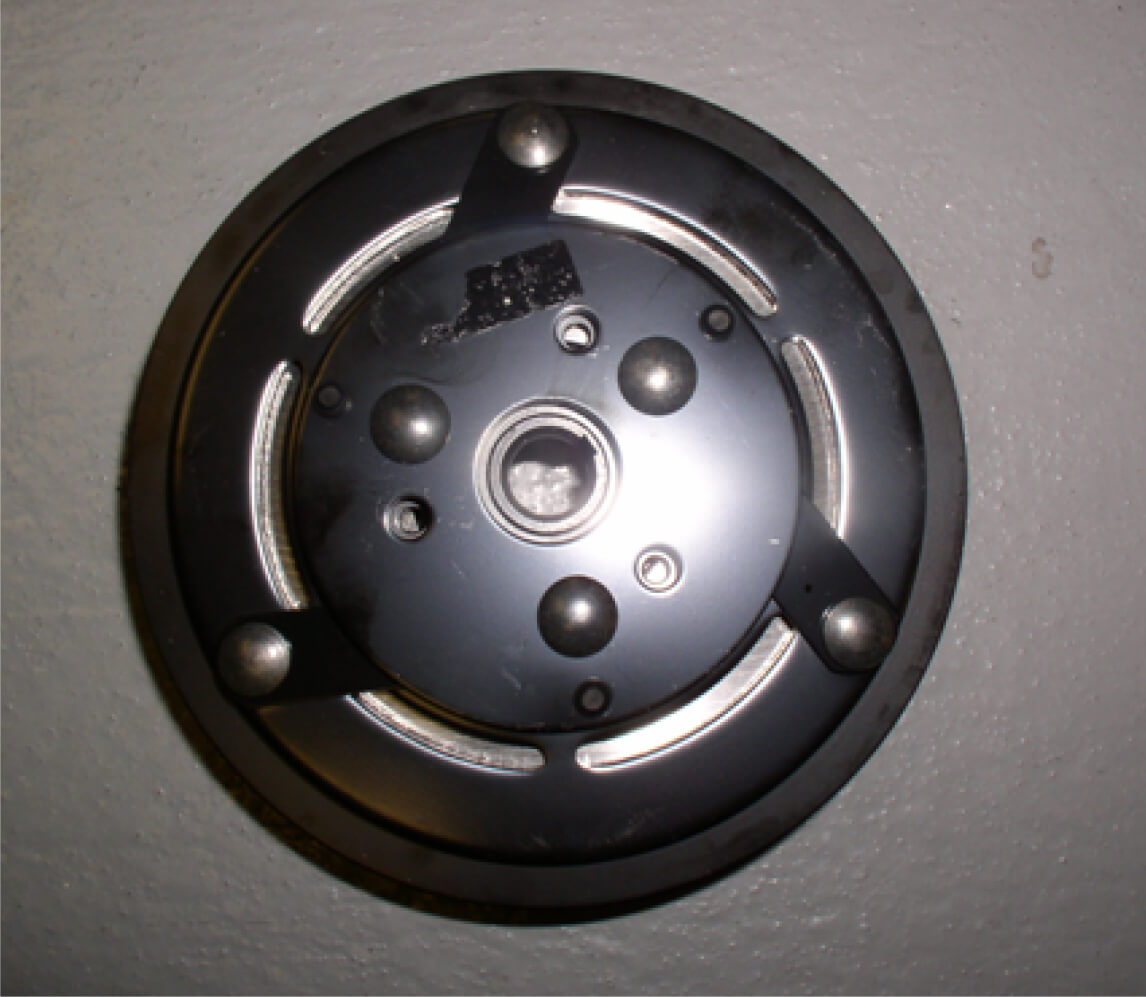
7. Install a 5/8-11-bolt (supplied) into the large threaded hole in the center of the clutch plate. Turn the bolt clockwise until the clutch plate dislodges, and remove.
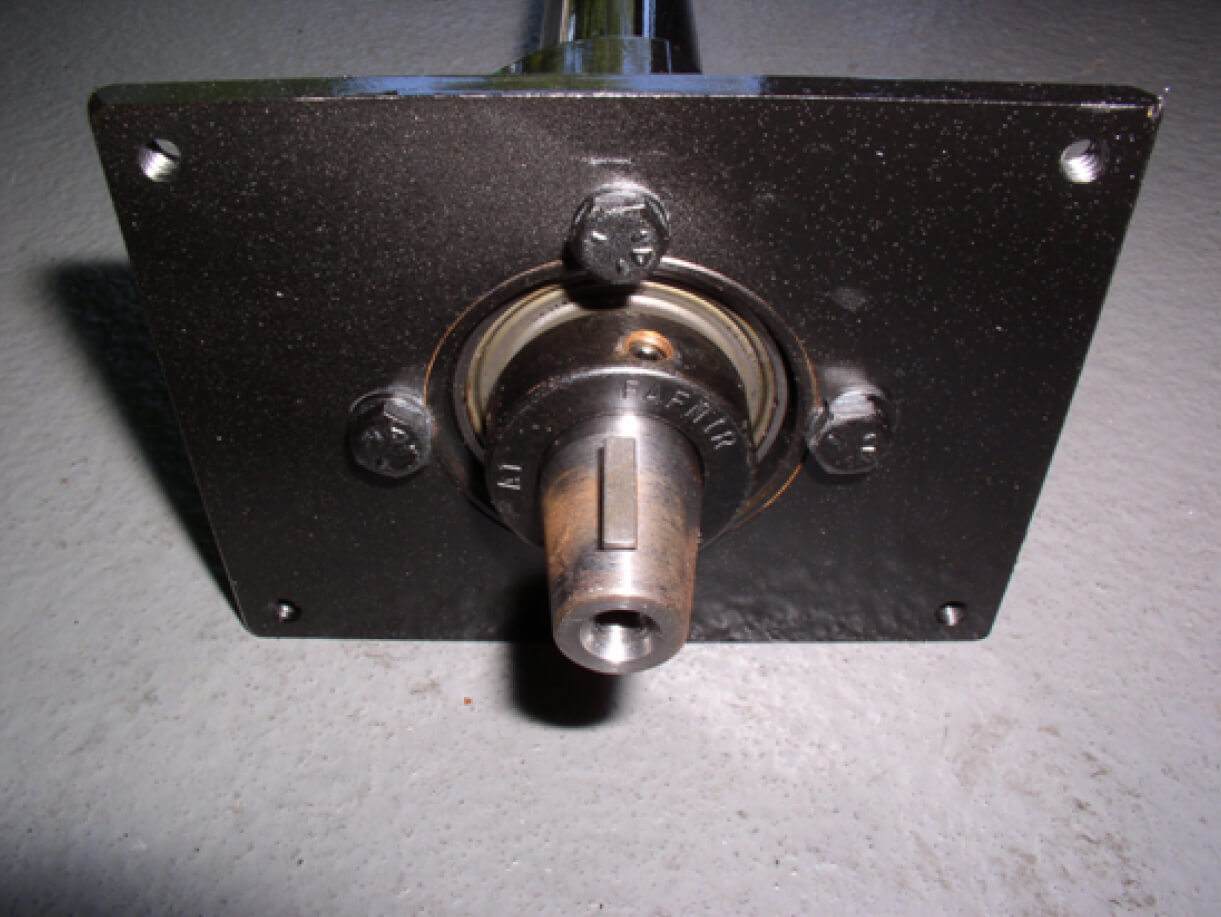
NOTE: Do not lose the keyway that is positioned in the key slot on the tapered end of the shaft (see below).
Clutch Removal Procedure: (cont'd)
8. Remove the pry bar inside the vehicle before proceeding.
9. Rotate the Driveshaft so that the keyway is positioned at the top of the Driveshaft.
10. Disconnect the clutch wire connector from the harness.
11. Remove the four (4) (1/4 - 20) bolts holding the clutch magnet to the Driveshaft.
12. Remove the ground wire from the top (driver's side) bolt.
13. Remove the clutch magnet from the front of the Driveshaft.
IMPORTANT: After removal of the old clutch and prior to the installation of the new clutch, the Driveshaft must be inspected. You must be absolutely sure there is no endplay or out of round at the front of the Driveshaft, otherwise permanent damage will occur to the new clutch.
Driveshaft Damage Inspection Procedure
To check for end play in the Driveshaft, firmly grip the tapered end and lift up, push down and move side-to-side. Turn the Driveshaft 1/4 turn and repeat this procedure until you have completed one (1) revolution. To check thrust movement, try to move the tapered end backward and forward (front to back).
Next, have an assistant spin the rear of the Driveshaft from inside the vehicle while observing the tapered end. If any movement is felt, or it appears to be out of round or wobbles, the Driveshaft must be replaced. In addition, the tapered surface and the tip of the Driveshaft must be free of burrs or damage, and the keyway and key slot must be in excellent condition. If the tapered surface or the tip of the shaft has any burrs or damage, or if the keyway or the key slot is not in excellent condition, the Driveshaft must be replaced.

NOTE: If you detect grease leaking from the Driveshaft, feel any excessive roughness or grinding, or there are signs that the Driveshaft got abnormally hot, the Driveshaft must be replaced.
New Clutch Installation Procedures
1. Install the new clutch magnet using the four (4) new (1/4 - 20) bolts.
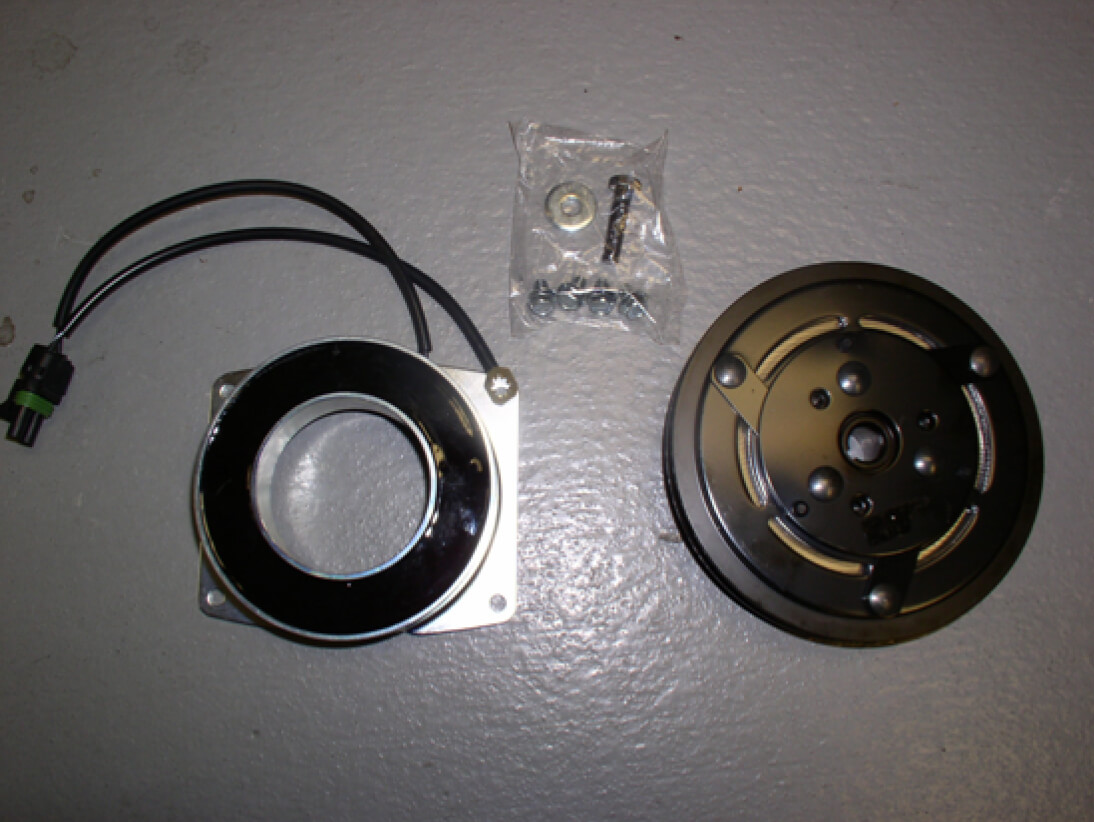
2. Connect the ground wire to the top left (driver’s side) bolt and tighten the four (4) (1/4 - 20) bolts to 5 ft. lbs.
3. Have an assistant re-insert the pry bar (or suitable tool) through one of the slots in the double V groove pulley on the end of the Driveshaft inside the vehicle. Position the pry bar to prevent the driveshaft from turning when installing the front clutch plate center bolt.

4. If the keyway was removed, re-install the keyway in the keyway slot and apply Loctite 609 (supplied) completely around the tapered end.
5. Align the clutch plate key slot with the keyway and position the new clutch plate onto the front of the Driveshaft. Insert the (1 1/4 x 5/16 - 24 nf) bolt and flat washer through the clutch plate and thread it into the tapered end of the Driveshaft.
6. Torque the clutch plate center bolt to 30 ft. lbs.
7. Connect the clutch wire connector to the wire harness.
8. Reinstall the two (2) front V belts.
9. Reinstall the vehicle’s fan shroud, air cleaner, and any other components that may have been removed to gain access to the V belts.
10. Reconnect the negative battery cable.
11. Remove the pry bar from the rear Driveshaft pulley.
12. Reinstall the single High-Pressure Pump V belt and the two (2) V belts that drive the Vacuum/Blower.
13. Reinstall Butler Equipment Shroud (black box).
CLUTCH BURNISHING PROCEDURE:
IMPORTANT: The burnishing of the new clutch (seating the clutch) is an important procedure to perform. With the vehicle's engine idling, engage and then disengage the Butler System 10-12 times consecutively, within 3 minutes.
If you have any questions, please contact the Butler Corporation Service Dept. at 1-800-535-5025
Driveshaft Clutch Replacement Procedure 20211209